Integration of FileCloud with Signority's eSignature platform is available in FileCloud versions 23.241.4 and higher.
Some user's plans may not include the digital signature option discussed here.
To ensure that your connection to Signority works properly, if you are using a firewall or blocking public connections, please allow requests from 52.60.130.76, Signority's IP address.
FileCloud can be configured to integrate with Signority's eSignature platform to enable your users to submit files for eSignatures.
How the eSignature process works
In FileCloud, the user selects one or more files to be signed. FileCloud creates a new PDF containing the file or files and prompts the user to specify a name for the PDF, a location for the signed document in FileCloud, and recipients who will be sent the document for signing. (The original files remain as they are, and can be used to create other signature documents.)
After the eSignature document is created, the user sends it from FileCloud to Signority and is prompted to add signature fields to the document for each recipient. The user then directs Signority to send signing requests to each recipient. Users have the option of sending a document for eSignature or digital signature. To understand the difference between eSignatures and digital signatures, see signority-esignature-vs-digital-signature-infographic.pdf
The user can now follow the signature document's status in FileCloud when the recipients sign it, and it moves from In Progress to Completed. The user also receives emails when each recipient finishes signing the document and when all recipients have finished signing.
Now, the user can access the signed PDF in the FileCloud location specified for storing the signed document.
eSignature documents for signing requests that are in draft or in progress are stored in Signority as well as FileCloud. When a signing request is completed, deleted, or expired, the eSignature document is removed from Signority.
The signer's experience
Reviewing and signing the document
The signer receives an email alerting them that a document is waiting for them to sign it. The signer clicks a link in the email to access the document in Signority. Once the user has reviewed the document in Signority they can sign it, and their task is complete. Signority automatically sends the signed document back to FileCloud.
Prerequisites for FileCloud/Signority integration
You must have a trial or paid Signority account, obtained either prior to setting up integration or obtained through FileCloud's admin portal eSignature screen.
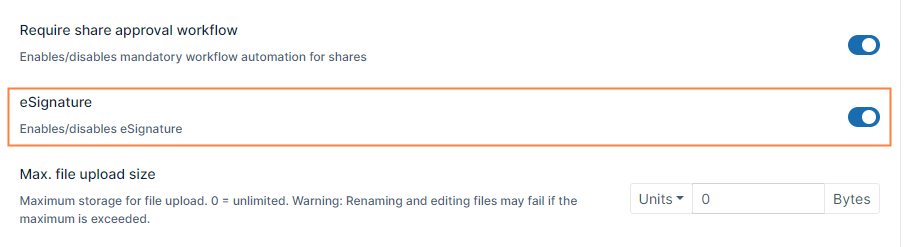
eSignature must be enabled in a user's policy for the user to be able to use the eSignature feature. By default, the feature is enabled in all policies.
The admin portal does not support these translations.
Audit details are omitted by default, but can be returned combined with an eSignature document or as a separate file. See To return audit details, below, for information on returning audit details.
DLP rules that block files from being shared do not block them from being sent for eSignatures.
Integrate FileCloud with Signority
The first time you access the eSignature screen you are required to either obtain a trial Signority account through FileCloud or enter the credentials for your existing Signority account
To enable eSignature:
Install and run FileCloud Document Converter if it is not running already. For help, see FileCloud Document Converter.
Go to the eSignature page.
To go to the eSignature page
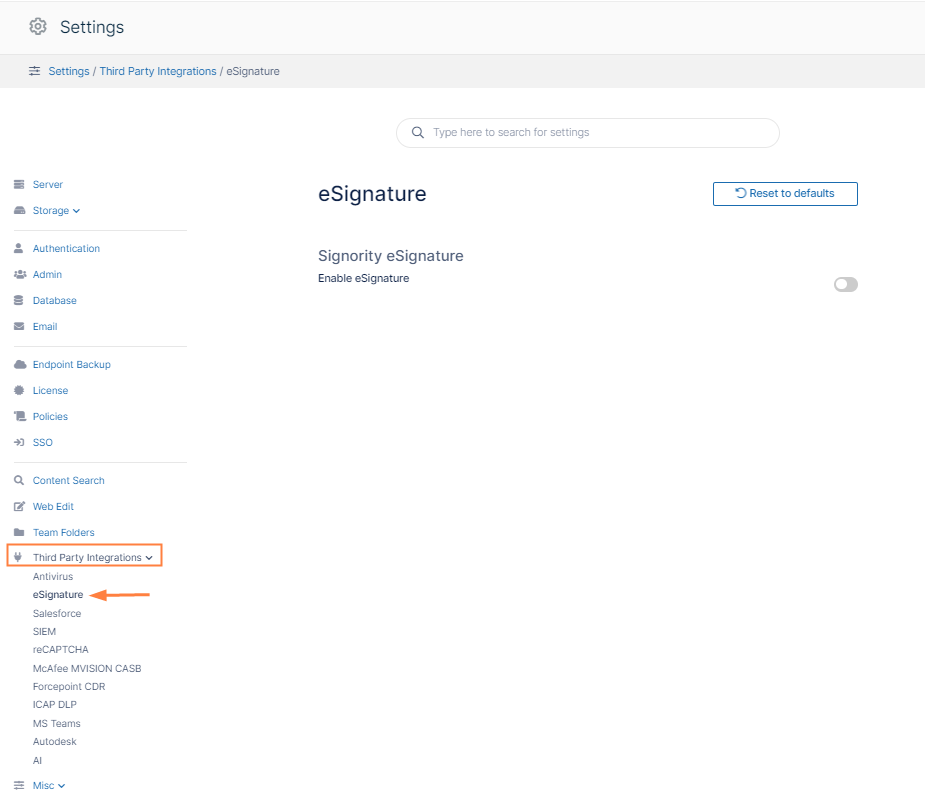
In the FileCloud admin portal's left navigation bar, scroll down and clickSettings.Then, on theSettingsnavigation page, clickThird Party Integrations.
In the inner navigation bar on the left of the Third Party Integrationspage, expand theThird Party Integrationsmenu, and clickeSignature, as shown below. The eSignature settings page opens.
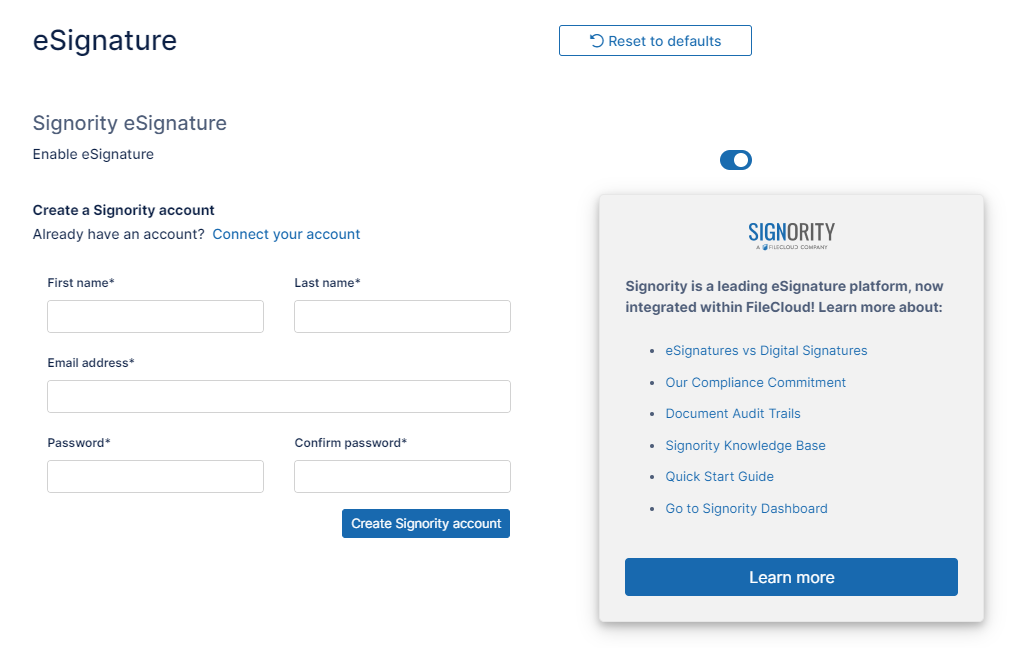
Enable the Enable eSignature setting. Fields for creating a trial Signority Account appear along with the link Connect your account for users who already have accounts.
To create a trial Signority account:
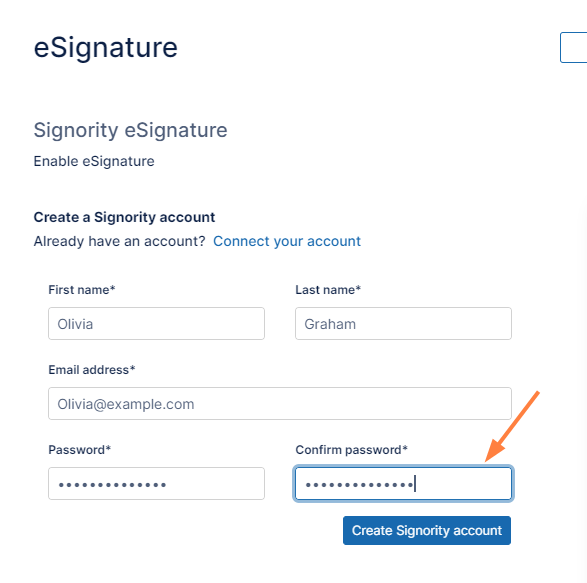
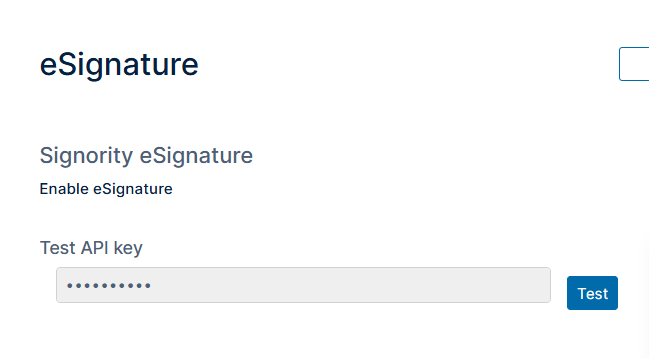
Enter the information requested, and click Create Signority Account. Your Signority account is created. The screen now appears as follows, withEnable eSignaturechecked and yourAPI Keyautomatically filled in.
ClickTestto make sure integration with Signority works correctly. If the test returns a success message, FileCloud integration with Signority is complete, and your users are now able to obtain eSignatures on files.
The trial account lasts for 90 days. You are sent notifications prior to expiration reminding you that before the trial expires, you must purchase a paid account to maintain eSignature capability. If you haven't purchased a paid account by the time your trial account expires, any documents already sent for eSignature can still be signed and processed; however, no new documents can be sent for eSignatures.
To convert a Signority account from trial to paid
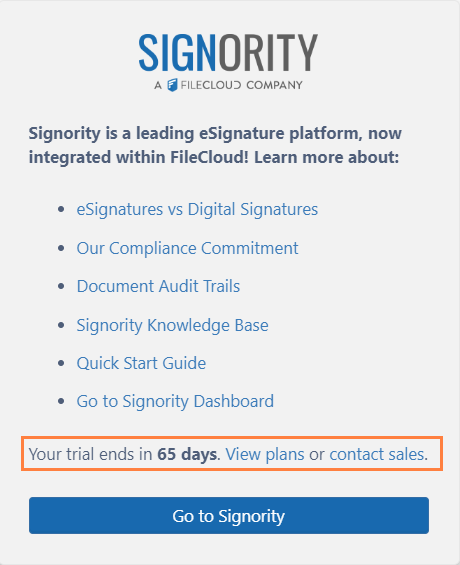
The eSignature screen includes Signority box that keeps count of the days remaining in your trial account and gives you links for viewing Signority account plans or contacting Signority sales:
Clickcontact salesto proceed with your Signority license purchase.
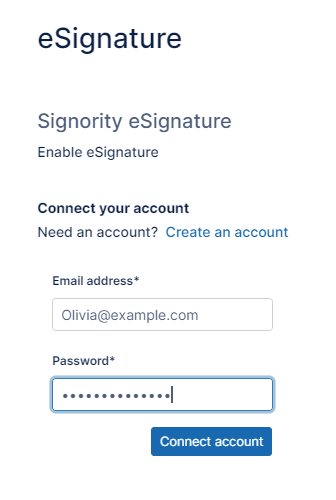
If you already have a Signority account:
Click Connect your account.
Enter your email address and password into the corresponding fields, and click Connect Account.
The screen now appears as follows, withEnable eSignaturechecked and yourAPI Keyautomatically filled in.
ClickTestto make sure integration with Signority works correctly.
If the test returns a success message, FileCloud integration with Signority is complete, and your users are now able to obtain eSignatures on files.
To enable/disable eSignatures for certain users:
By default, the eSignature feature is enabled in users' policies.
In the FileCloud admin portal's left navigation bar, scroll down and clickSettings.Then, on the Settings navigation page, click Policies . The Policiespage opens.
Edit the users' policy.
Click the User Policy tab. Scroll down until you see the eSignature field.
Enable or disable eSignature.
For information about the eSignature process for users, see eSignature Requests.
To return audit details
Click here to expand...
When the files are accessed in FileCloud:
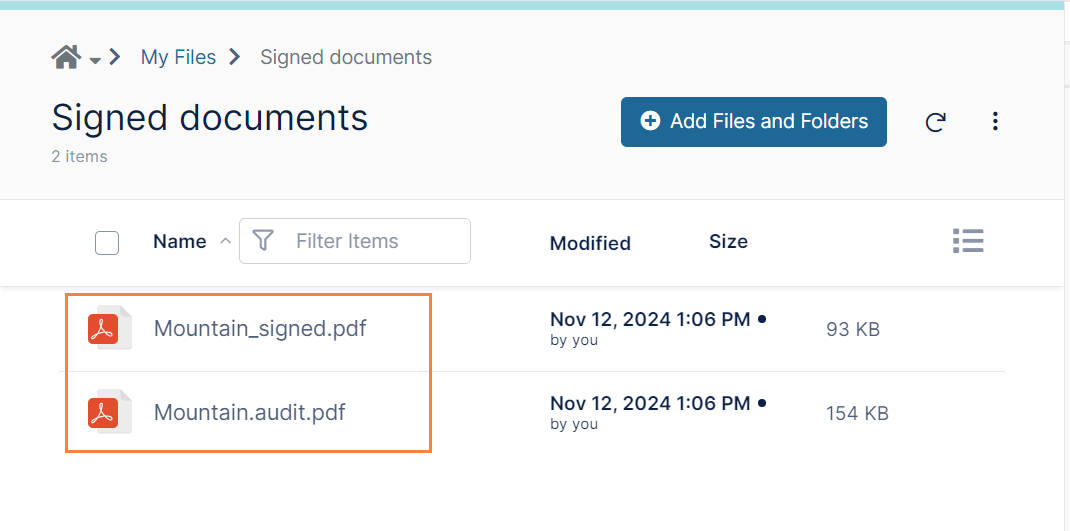
By default, when the eSignature document is returned to the destination path specified by the user or the Completed panel in the eSignature page in FileCloud, the document is returned without audit details. However, you may configure the process to either return a separate audit file or audit details attached to the eSignature document in the destination folder,
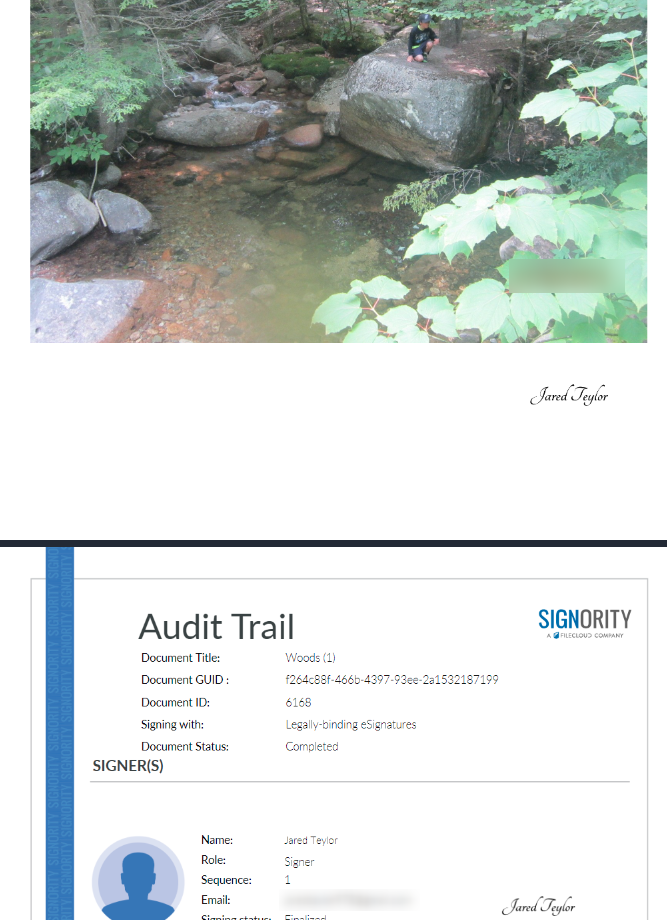
When separate signed and audit files are configured, they appear in the destination folder as:
When audit details are attached to the eSignature document, the audit information follows the signature file in the eSignature pdf:
The options for receiving audit details are the following:
Setting code
Description
100
No audit details (default)
101
A separate audit file is sent to the destination with the eSignature document.
102
eSignature: Audit details are attached to the eSignature document. Digital signature: A separate audit file is sent to the destination with the eSignature document.
To change the audit details setting:
Open the cloudconfig.php file Windows Location: XAMPP DIRECTORY/htdocs/config/cloudconfig.php Linux Location: /var/www/html/config/cloudconfig.php
Add the following line, setting the value according to the codes specified above.
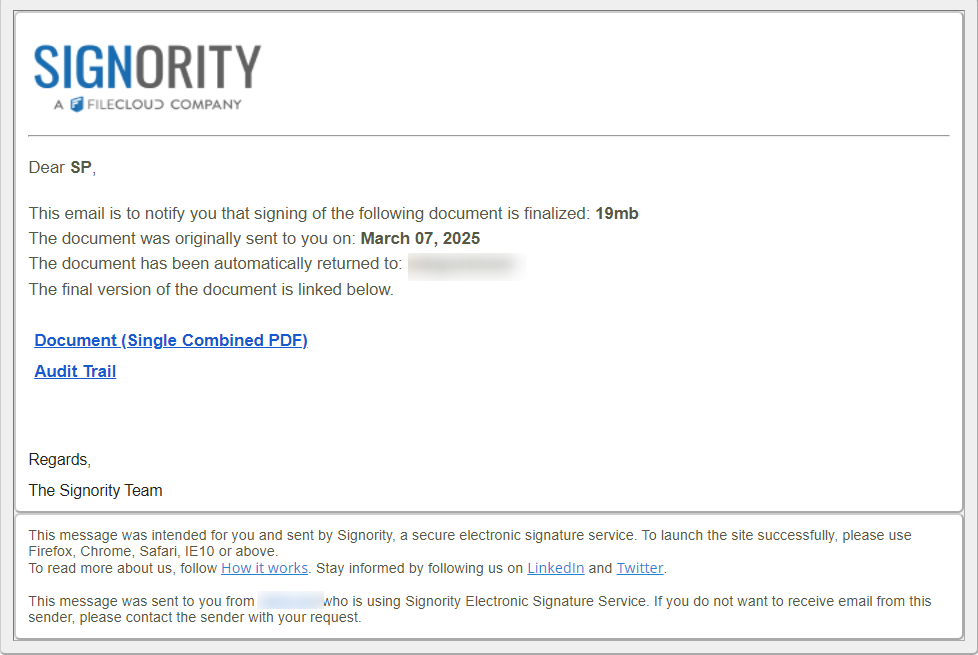
When the files are accessed from the Email notifying the requestor that the file has been signed:
By default, in the email notifying a signature requestor that an eSignature document has been signed, a link to the signed document is included. By default it includes separate links to the signed file and the audit details file.
However, since this email is sent from Signority, you can log in to Signority to configure whether or not the audit trail is sent as well as whether multiple signed documents are combined into a single PDF.
To specify what is included in the email notifying the requestor that the document has been signed:
Log in to Signority.
In the Signority navigation panel, click Admin, and then click Settings > Global Settings.
In Global Settings, locate Notifications settings and configure options for the requestor notification email.
JavaScript errors detected
Please note, these errors can depend on your browser setup.
If this problem persists, please contact our support.